So off to the local lumber yard I went. I ordered the OvrX and lo and behold, they had it in stock. I was able to load all 43 tiles (i.e 172 square feet) into my little Echo, so I guess you could call that an advantage.
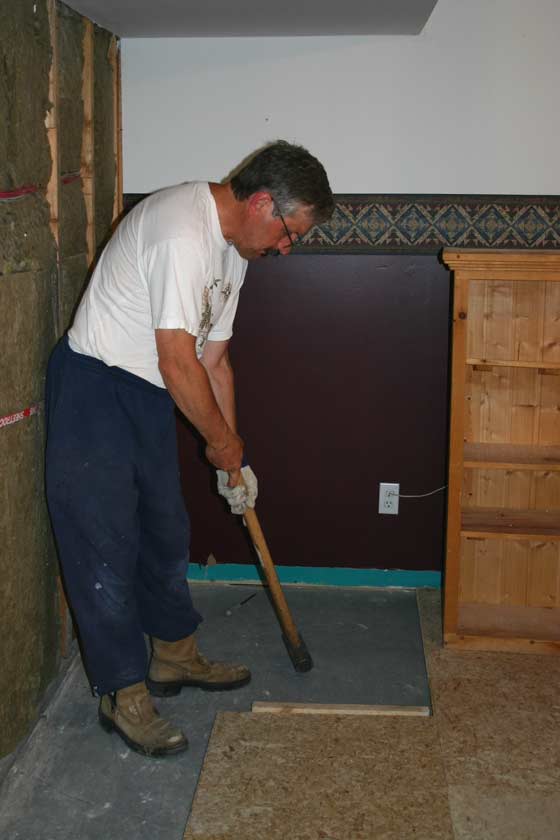
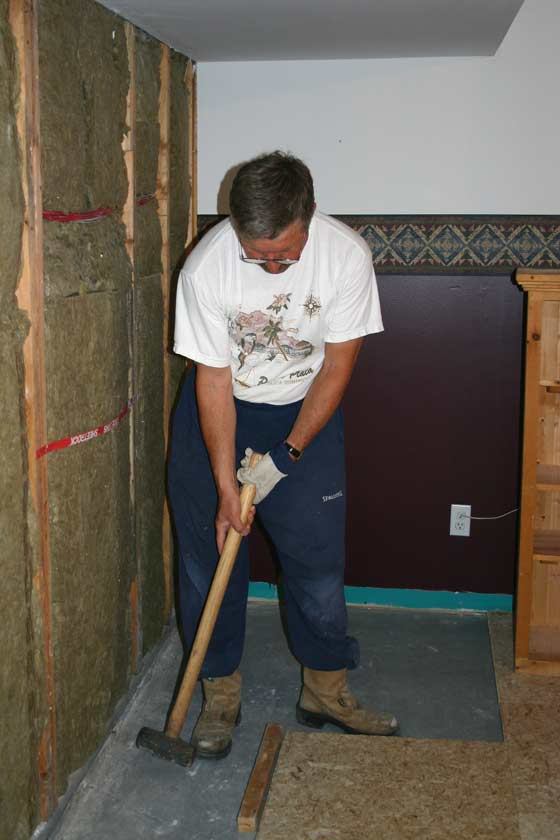
 Now, when I got futher into checking out the condition of the walls and the insulation contained within them, I just made an on the spot decision to tear it all out. Like Mike Holmes would say: "It's all gotta come down!". On the outside wall, there was about 1" of beaded styrofoam, but only at the upper 3 feet, the rest had nothing. This was overlaid with, count them, 2, not 1, layers of drywall. The drywall was held up by 2" x 2" strapping. The beaded styrofoam sat between this, with lots of air gaps. In addition, some of the inside walls had mould on the bottom of the drywall. Not a good situation. The fun part about ripping out drywall is that it goes very quickly. The drudgery part is cleaning it all up. Next came the strapping. Down to clear bare concrete walls.
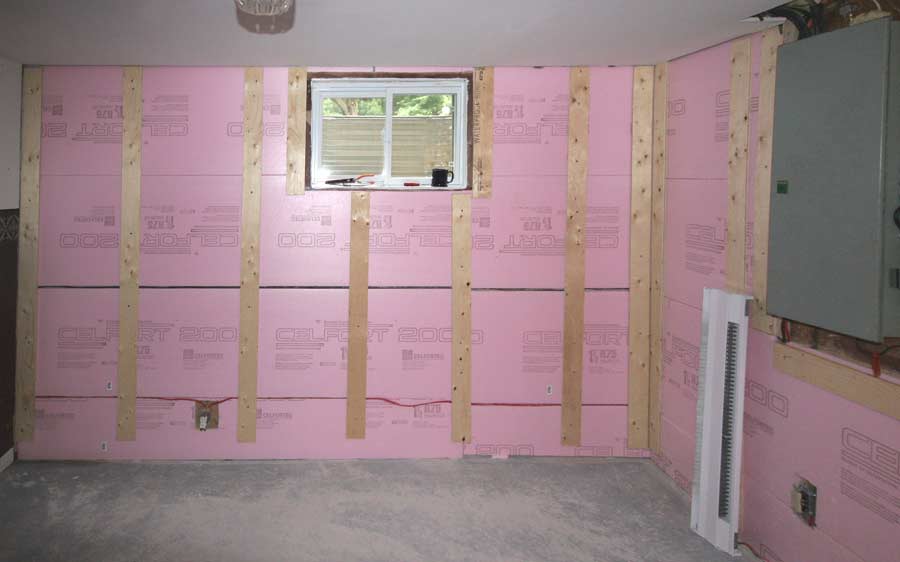
I decided to do the outside walls with extruded polystyrene, commonly called styrofoam pink. These sheets I applied straight onto the concrete wall. That way, you have an continuous, uninterrupted insulation barrier. No gaps, no nothing. If you cut the sheets just a fraction too wide, they'll stay in place because of the friction fit. No glue or anything necessary. Somewhere I had read that you should then apply 1 x 3 strapping every 2 feet and attach your drywall to this. I followed a slightly different technique by using plywood instead. I went to the lumber yard, bought a sheet of half inch plywood, then asked them to cut it into 12 strips of 3 7/8, which they were happy to do of course at $ 0.50 a cut. Then I simply applied these strips to the wall instead of the strapping. The reason I did this is because the 1 x 3 strapping tends to be very cheap spruce, and when pierced by drywall nails, it can split very easily. When this happens, its holding power is obviously severely diminished. This will not happen with the plywood. By the way, I attached the plywood strips to the wall by first drilling a hole through the plywood, the styrofoam and then finally into the concrete, making sure that the total depth of the hole was a minimum of 3 1/4". Then I used 3 1/4" Tapcon screws to do the final attachment. Overall, the wall operation (i.e.styrofoam and plywood strips) went fairly smoothly. The pink styrofoam is easy to work with. It comes in shiplap, and to accommodate electrical cables, I simply cut off the shiplap from one piece and routed the cable through the channel that became available because the shiplap was no longer there.
Since I used 1 1/2 styrofoam, the total insulation value of the outside wall from top to bottom is R 7.5. Not quite code, but a heck of a lot better than before.
 Next, I applied the OvrX. Hmm, wish I could say this was a snap to install. Unfortunately, it wasn't. I had one heck of a time keeping the tiles aligned. The tiles are tongue-and-groove and I suppose that it doesn't take much for OSB chips to clog the tongue, forcing you to bang away at the other end of the to-be-inserted tile. Too much banging puts the previously laid tiles out of alignment and so round and round we go.
In hindsight, what I would have done is attach the first couple of tiles to the floor with Tapcon screws. That way they would be kept nice and steady and theoretically wouldn't budge easily. So I struggled at floor level, tapping and banging and cursing, all at the same time. I took me about 4 hours to do a 160 square feet floor, not exactly record speed, in fact very slow. When almost done, I discovered that using a piece of 2 x 2 and a sledge hammer, I could lay the tile while standing, which made for quite an improvement in my working conditions.
It is also very hard to get the last row to fit in properly, since
 you have no 'banging' room. I used a tool for applying laminate flooring to get at least some leverage, but still, it was a struggle. In the end, I decided to drive some Tapcon screws through some of the pieces where the seams weren't all that close together. This is something I rather would not have done.
I had run a temperature check on that room, prior to laying the OvrX tiles. Over a 24 hour period, the temperature difference between ceiling and floor temperatures was close to 4 degrees. After the tiles were laid, this difference went down to around 2 degrees. Once the laminate floor went in, it further decreased to 1.5 degrees.
Next on the agenda was the drywall. I wanted to minimize the amount of joints required and so we used 12' sheets for most of this. Ronny helping me out with this made it all that much easier. Taping and mudding went fairly easily, along with applying primer paint. I don't know about the finish paint, as
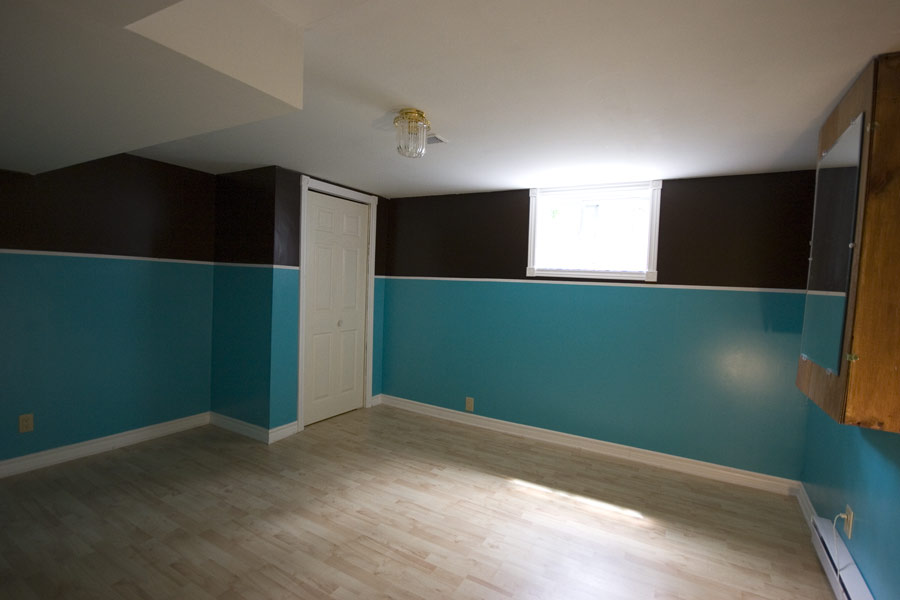 the design for that and the application of it was done by Amanda!
The laminate floor went in without a hitch. Then I hung the doors (huge pain, as everything is crooked!) and applied the trim, caulking and painting. Now it's done. Almost. The brown cabinet hiding the electrical panel still needs to be painted white. But then, you should always leave something to look forward to, shouldn't you?

3 comments:
Keurig keurig keurig!!!!
Ziet er goed uit.... toch vraag ik me nog steeds af of die scheidingslijn tussen de twee verschillende kleuren nou waterpas is of dat u gewoon de plafond lijn of vloerlijn heeft aangehouden hahha... ziet er leuk uit...
Groetjes Ronny
I've been following your review of subflooring - very useful. What was the total height of your new floor? Did you put a gasket around the room's edge - I saw this on another Orvx fan's post and wondered is it a foam gasket to keep subfloor air/moisture from mixing with room air - quite the opposite to the Dricore leaflet's suggestion (cut grills in the subfloor every 8'). Did the Orvx tiles' grooves influence your choice over the foam panels/plywood option?
I'd like to control the subfloor humidity level with sensors which trigger a very small fan and send this air outside. Any tips on the set up and equipment I'd need?
The total height of the new floor is 1 9/16" or 39 mm. I did not actively put a gasket in around the edges, though I did fill some of it in with loose pieces of styrofoam I had. The grooves really did not have an impact on my decision. I guess my situation is somewhat unique in that as long as the level of ground water is below the floor, there is no seepage to worry about. The only moisture would be condensation on the cold floor frommoist air brought in from the outside.
The rest of the basement I'll end up doing using 4 x 8 sheets of styrofoam and plywood. From my point of view, it should be easier to install and also there should be less worry about things shifting after construction is done.
That's an interesting thought: controlling humidity levels with sensors and fans! I never thought about that. Here's how it could be done, (or rather, how I could do it. You need to be somewhat of a computer geek in order to follow this approach.)
http://www.ibuttonlink.com/ sells temperature and humidity sensors, which can be read with the appropriate software. I've got their LinkTH, for which they have off the shelf sensor monitoring software. I chose to custom write an application in Visual FoxPro. It doesn't do much in particular right now, it just logs the results of the temperature sensors output every 30 seconds and publishes a 24 hour summary every 5 minutes to the web (http://harmony.anikast.ca). Eventually I hope to start monitoring the performance of my geothermal furnace, but for now, that's all it does.
However, the custom programming could be extended to monitor humidity levels and when a certain threshold is met, trigger a relay, which would control a fan. I've done something similar to control lights in the house while on vacation, using the X10 Firecracker.
Post a Comment