Friday, September 14, 2007

Directions from Toronto International Airport to Simcoe Part III

Again, once you are on the regular, 3 lane portion of Hwy 403 towards Hamilton, stay in the second lane from the left, the middle lane. This takes you exactly to where you need to go. This picture shows where the Lincoln Alexander branches off from 403. About 2 km past this point, Hwy 403 narrows to 2 lanes. If you are in the middle lane, then you do not have to do anything.


You can breathe a sigh of relief now: traffic should get a lot lighter. From the Lincoln Alexander to Hwy 24 South to Simcoe is about 40 km. You'll pass through the city of Brantford. Note that there is also a Hwy 24 North exit, you do not wish to take that. You'll end up in Cambridge.


Here is the actual exit off 403 to Hwy 24 south. Once on the exit lane itself, stick to the left. At the end of the exit lane (ramp), there are traffic lights. On green, turn left onto Hwy 24.
Hwy 24 is 2 lanes, so it is not an expressway!


Hwy 24 can be divided in roughly three parts. The first part is done when after about 10 km, you reach a set of traffic lights. At the green light, drive straight through to the next set of lights (about 15 km). Once again, keep going straight. After that, at about 2 km, you will see the blue 'Norfolk County" sign. You are getting close!


From here on in, you will start seeing signs, spaced 1.2 km apart, pointing to Windham Rd 2, 3,4,5 etc. (There are also Townsend Rd going left (east) but ignore those. ) The road you are looking for is Windham Road 12. It obviously follows Windham Rd 11. There is a green and yellow John Deere farm machinery dealership just past Windham Rd 12. If you miss the road, simply turn into the parking lot of the dealership and make your way back through this parking lot to its Windham Road 12 exit.

Once on Windham Rd 12, there is a stop sign after about 3 km. (Speed limit here is 80 km). STOP and give right of way to ALL traffic on the crossing road. Proceed with caution. Drive another 3 km. On the side of the road, you'll see house numbers mounted on metal posts, green signs with white numbers. Our number is 801. The two numbers prior to that are 827 and 823, so once you pass 823, SLOW DOWN. From that point it is about 150 metres. Pull into the driveway. You have arrived!


Directions from Toronto International Airport to Simcoe Part II

Once you are on Hwy 403 (during rush hour this stretch could be slow to very slow travelling), then after about 3 km, you get to the point where the two separate parts of 403 meet. The trick here is to be in the second lane from the left.


By far, the best point to travel from here on in on the expressways is the second lane from left. This, at most points, automatically leads you to where you want to go. Note that at this point on the 403, the far left lane is reserved for High Occupancy Vehicles, that is, cars with 2 or more people in it. This special lane continues for about 15 km. If traffic is extremely slow, use it, otherwise don't bother, just stay in the middle lane of the three regular lanes.


At this point, about 15 km after Eastgate, about 1 km after Winston Churchill Boulevard, Hwy 407 branches off from Hwy 403. You want to stay on Hwy 403 towards Hamilton. Best point to be is in the middle of the 3 regular lanes. This is the advance warning sign.


This is the actual point where 407 branches off of 403. Stay in the second lane from left. This leads you automatically onto 403 towards Hamilton.


Once you get past the 407 branch off, you need to once again get into the 2nd lane from the left on 403. Then, after about 5 km, Hwy 403 and QEW meet up. You'll see Lake Ontario in the distance and a huge Ford car factory with giant chimneys on left at that point. Slowly work your way over to the 2nd lane from left and stay there. This is what it looks like for the most part on QEW. If your luck is bad, this can be a slow stretch during rush hour.


After about 25 km on QEW, Hwy 403 reappears and branches off from QEW. This is the advance warning sign at Brant Street. Be in the middle lane here.


Make sure that you stick to the right hand side of the middle lane here. That will guide you onto Hwy 403 Hamilton and Brantford.

Tuesday, September 11, 2007

Directions from Toronto International Airport to Simcoe Part I

These are the directions to get from Toronto International Airport (technically called Pearson International Airport) to 801 Windham Rd #12, Simcoe, Ontario

First some points to make things clearer.

There are no roundabouts in Ontario.

Expressways (minimum 4 lane divided highways) all start with the number 4, for example Hwy 400, 401, 402, 403, you get the picture. The only exception is the QEW (Queen Elizabeth Way), the expressway that leads from Toronto to Niagara Falls via Hamilton.

Speed limit on expressways is 100, on 2 lane highways it is 80. Now, that's the theoretical limit. If it isn't rush hour, most people will drive between 110 and 120 on the expressway and 90-100 on 2 lane roads. It is best to judge what other traffic is doing and keep up with the flow: neither too slow nor too fast.

On any road with more than 1 lane going in each direction, it is perfectly legal to pass on the right. That's right, on the right. So if you are changing lanes to the right, you need to make damn sure no one is trying to pass you on that side.

If a road narrows from 2 lanes to 1 lane (or 3 lanes to 2 lanes), it is generally the right lane that disappears, so that the person in the left lane automatically has the right-of-way.

There are no speed cameras mounted on the side of roads anywhere in Ontario. None. Police presence on highways is minimal.

The quality of the roads is generally acceptable to mediocre. Think Belgium and then take a step back.

A brief description of the route to take:
-from the Airport, enter Hwy 427 SOUTH (+/- 2 km)
-from Hwy 427, enter HWY 401 WEST to London (+/- 3 km)
-from Hwy 401, enter Hwy 403 to Hamilton (+/- 10 km)
-from Hwy 403, enter QEW to Hamilton (+/- 30 km)
-from QEW, enter Hwy 403 (again) WEST to Hamilton, Brantford (+/- 35 km)
-from Hwy 403, enter Hwy 24 SOUTH to Simcoe (+/- 50 km)
-from Hwy 24, enter Windham Road 12, stop for STOP sign after 3 km, then straight through another 3 km to number 801 on the right
-pull in driveway

OK, the first picture is an overview of the entire trip. Overal distance is about 125 km and general direction is to the southwest.


From the jumble of roads within the airport, you need to look for signs that take you to Hwy 427 south. Pay close attention as there are a lot of roads right within the airport area and you might have to cross some lanes to get to the correct lane. Make sure it is safe to change lanes. Generally there are 2 large signs, spaced about 1 km apart, that warn you of an upcoming road change.


Once on Hwy 427, you'll follow it for a few kilometres. You will need to stay in the right hand lanes and observe signs closely, looking for Hwy 401 WEST. The advance warning sign looks something like this:


The actual exit ramp from 427 to 401 looks like this:


Once on 401 (the airport's runways are just across the fence on the right hand side) you need to look for Hwy 403 WEST to Hamilton. It is about 4 km from the Dixie Road exit.

The advance warning sign for Hwy 403 Hamilton look like this:


The actual exit sign looks like this. Notice that Hwy 410 branches off to the right with the 2 right lanes, so you need to be at least in the third lane from the right at this point. Start moving over there once you pass Dixie Road (well signed)


Saturday, December 16, 2006

Point Pelee, Canada's most southern mainland point

We visited Anne's sister and brother-in-law in Kingsville, Ontario last weekend. On Monday we made a short trip to Point Pelee National Park, which just so happens to contain Canada's most southern mainland point, at something like 41.90 degrees north, about the same as Barcelona, Spain and Rome, Italy.


The park consists of mostly wetlands, which I
cannot help to find nothing but a euphemism for swamp. There is also some forest cover, containing some rare trees (for Canada, that is). It is a birder's heaven as the north shore of Lake Erie is a migratory path for many bird species.


The weather was warm for this time of year, the park deserted. Lake Erie was quiet, with just a bit of sunlight peaking through the clouds here and there. It always evokes a feeling of desolated beauty in me when it is like this.

Thursday, December 14, 2006

Christmas Sign...must be a sign of Christmas

Years ago, around 1990-1991, I wanted to have the fanciest Christmas ornament on the block. I must've have gotten that idea after watching Chevy Chase's Christmas vacation. Anyway, I designed a sign made up of probably 250 to 300 leds. Power consumption between 11 and 27 watts.

It writes 'Merry Christmas' out by starting on the left and continuing to the right. When the last LED is lit, the whole thing resets itself, all the LEDs go out and the pattern is repeated, ad nauseum. There are some different patterns available though, twinkle, blocks of LEDs switch on and off, as well as different speeds can be had.

I'm afraid I was responsible for the entire design, including the clock and all other circuitry. I guess I always did like tinkering with resistors, diodes and the like. "Ummers and puffers" as we used to call them. The heart of the clock circuit is the ubiquitous 555 timer, the devices that light up the LEDs are 74LS164N 8 bit shift registers. You can think of it as a bucket brigade. The LEDs are the cheapest kind available.

The overall size is about 1 meter by .25 meters. After designing the circuit boards, I had them printed in a silk screening place, where they normally do logos on T shirts, so this was quite a different job for them. Then I etched them at home myself and then drilled the holes for all the components using a drill stand and a portable electric drill. This was tricky, as the holes are very small and the bits break easily.

The case was made out of plexiglass (or Lexan) .


We have had this in and around our house during the Christmas season for the last fifteen years or so. However, this year when I got it out, it didn't work! Having totally forgotten how this thing even worked, I had to tinker with it to get it to go. A cold solder joint was the problem. Found it by pure luck. I did manage to blow 2 power supplies though, while testing. Luckily, I had a third, which was a DC one, so I had to bypass my original AC design.

Now I'm confident it will likely work for another fifteen years.....

Sorry about the crappy GIF, but I do have a life.

Thursday, November 30, 2006

Notebook as energy saver?

I've been hard at it, the last five weeks or so, doing a rush job coding a web application. I initially had intentions of doing this coding on my desktop computer downstairs. Somehow, though, I kept putting that idea off, because the couch is so damn comfortable..... It ends up I did the whole thing on my notebook, a 2 year old Dell Inspiron 1150 with a sticky keyboard.

Last year, I bought this little gadget (Kill-A-Watt meter) that can track energy consumption for individual devices, e.g. a stereo, a TV, a computer. I bought it initially to prove to myself that the freezer in the garage was an energy hog and that it had to go. Wrong....., it only consumed a kilowatt a day. So the freezer is still there. I also had it plugged into my desktop computer for a while and that device seemed to consume around 120 W an hour. If you think that the power supply on it is rated at 480W, that doesn't seem too bad. After that, I forgot about the gadget for a while. It was gathering dust until I decided last week to plug it in between my notebook computer and the wall outlet.

Turns out that the notebook is a real enery mizer as compared to a desktop computer. First off, I never turn off the notebook, though it does go into hibernation after half an hour. While up, it runs a slew of applications such as Visual FoxPro, SQL Server Express, Visual Web Developer Express. Still in all, while running, it only consumes around 22 wats. It's funny to look at the meter while you're opening an application: it shoots up to 40 or 50 watts for a few seconds and then fall back to 22 or so.

On average, it consumes 11 watts an hour for each of the 130 hours or so that it has been plugged in. Not bad eh?

Just think of the phenomenal energy savings that could be had by replacing all desktops with notebooks....

By the way, just for fun I plugged in my USB light to see what it consumes. Answer: 1 watt....too bad it's bloody useless.

 Posted by Picasa

Thursday, October 12, 2006

First Snow!


Hard to believe, October 12th and it's snowing! The Impatiens and Cala lilies are still in bloom, but that failed to stop the snow from falling. It didn't last long, but there it was ... a harbinger of things to come.

Wednesday, September 06, 2006

Property Bar location using GPS (and Visual FoxPro) Part II

Ok, so in the last post I threw out some generalities regarding the project. This time we'll try and get down to some specifics.

I tend to attack projects from a proof-of-concept point of view. First, I'll try and get a rudimentary version up and running of whatever idea I'm working on. That keeps me interested. Once that has been successfully accomplished, that will motivate me to round it off with user interface etc, all the boring stuff that I've done for too many years now. That's not considered good practice, but hey, I'm the boss around here so I offer no apologies.

And so it went in this case.

Cost is always primary in my mind: it is a sport to keep software costs down. I purchased a Holux USB GPS module on eBay last year, which included a purported legal version of Microsoft Streets and Trips 2005. (I should point out that, even though this is a USB device for a hardware point of view, it presents itself as a serial port device from a software point of view.) The GPS works fine with MS S & T, but I was hoping that it would also include an ActiveX control, which I could then use to program the GPS from my own applications. However, it didn't, so I hunted around for other GPS serial port ActiveX controls on the web. There's quite a number out there, but the price is somewhat steep. So I decided to see if I could use the serial port control included with most (or all) versions of Windows, MSComm. After the usual amount of trail-and-error and some research on the web, I got it to work with the GPS. The GPS reports its status every second when it rattles off a number of phrases all of which start with a $ sign. Of the 3 or 4 phrases the Holux offers, I only used the $GPGGA one, which dissects as follows:


*$GPGGA,123519,4807.038,N,01131.000,E,1,08,0.9,545.4,M,46.9,M,,*47
*!* Where:
*!* GGA Global Positioning System Fix Data
*!* 123519 Fix taken at 12:35:19 UTC
*!* 4807.038,N Latitude 48 deg 07.038' N
*!* 01131.000,E Longitude 11 deg 31.000' E
*!* 1 Fix quality: 0 = invalid
*!* 1 = GPS fix (SPS)
*!* 2 = DGPS fix
*!* 3 = PPS fix
*!* 4 = Real Time Kinematic
*!* 5 = Float RTK
*!* 6 = estimated (dead reckoning) (2.3 feature)
*!* 7 = Manual input mode
*!* 8 = Simulation mode
*!* 08 Number of satellites being tracked
*!* 0.9 Horizontal dilution of position
*!* 545.4,M Altitude, Meters, above mean sea level
*!* 46.9,M Height of geoid (mean sea level) above WGS84
*!* ellipsoid
*!* (empty field) time in seconds since last DGPS update
*!* (empty field) DGPS station ID number
*!* *47 the checksum data, always begins with *

Of course, I didn't figure this out on my own, but got most of it from
http://www.gpsinformation.org/dale/nmea.htm.

The MSComm control has a property RThreshold (for receive threshold). I set this at 2. By default, it is set at 0. When set at 2, it makes the control receive 2 characters before it fires the OnComm event. If it is set at 0, the OnComm event does not fire at all. The OnComm event is really the heart of the MSComm control, this is where the action takes place. Simply put, all the characters are received and the string is parsed for the values contained in it. These values are then logged to a database table, and depending on what action we are currently executing, a method is called to execute that action.

The next major item is the graphing software. As I said in my previous post, I used NTGraph for this, another ActiveX control. To do plotting, simply feed 2 values to the PlotXY method and as long as they fit in the range of the graph (which can be dynamically altered), it will plot the values. If it is outside the range, you can change the values of the range, and all previously plotted points will automatically be replotted on their new spots on the graph.

The third major item is the computer voice. Now this is where it gets really easy. The voice is done using an ActiveX control included in all Windows version. I simply instatiated it in the init of my form, as such


thisform.oSapi=CREATEOBJECT("SAPI.spVoice.1")

then all you need to do to have it speak is the following:

thisform.oSapi.Speak("Keith is one helluva guy")

Of course, I didn't figure this out on my own, Calvin Hsia showed me the way.

Ok, that's it for today, before information overload sets in.

Tuesday, August 29, 2006

Property Bar location using GPS (and Visual FoxPro) Part I

I worked on this project back in the spring of this year (2006). What I was trying to do was find property bars on our property using GPS. When you're out in the forest, it is very tough to keep yourself oriented properly. Looking for a bar that way is like looking for a needle in a haystack. Your best chance to find one is to trip over it.

The idea to use GPS in aiding the search sprung from other projects where I used a GPS to do location logging, plus the fact that there are supposed to be some property bars in our forest which have yet to be found. Now, knowing exactly where our property line is is not that big a deal, just curiosity really, but still. There's an area, particularly in the southwest corner, where I'd like a bit more clarity as to who owns what. It seems funny that this whole area was surveyed about 8 years ago, but now not even 1 bar is to be found anywhere...looks like somebody would rather not have them found.

Anyway, the general idea is as follows:

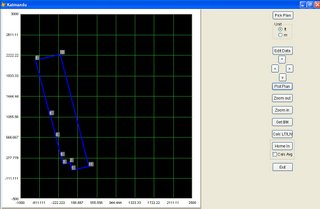
- have a property plan
- have a computer program where you can enter the azimuths of the various lines that constitute the property limits as well as the distances between the various points where these lines intersect.
- have the computer plot this plan so that the plot is oriented properly with respect to true north.
- take a GPS and have the computer track and log the information received.
- program the computer so it can establish a latitude/longitude position for anyone of the points of intersection of the plan (a 'bench mark' position)
- program the computer so it, given the latitude/longitude position of anyone of these points, can calculate the lat/long of all the other points on the property line.
- program the computer, so it can plot the current position of the GPS on the above plan.
- program the computer, so it can 'home' in on a certain point, with a computer voice telling you in what direction the to-be-found point is and how far off we are.
- program the computer, so it can provide an average plot of the last number of GPS readings

First off: what is azimuth? This is the direction of a line, measured clockwise around the observer's horizon from north. So an object due north has an azimuth of 0°, one due east 90°, south 180° and west 270°. There, that was easy.

You can tell there was a fair bit of programming involved. The GPS logging stuff I had already done for my previous efforts, so that was re-used. To display the various plots, I used a free ActiveX control called NTGraph. Since we are now looking at Microsoft Vista, the name NTGraph will be more than enough to scare off some people. Not me. I've used it for a number of projects and, although a bit quirky at times, it is certainly very stable and very flexible.

Surprisingly enough, to calculate the lat/long of Point B, given the distance and azimuth to it from Point A, is fairly complex. A fellow by the name of Victor Fraenckel wrote a Visual Basic program to do this. His program was based on T. Vincenty's article "Direct and Inverse Solutions on the Ellipsoid with Application of Nested Equations" as published in Survey Review, April1975. In this article, Mr. Vincenty stated that "In selection a formula for the solution of geodesics it is of primary importance to consider the length of the program, that is the amount of core it will occupy in the computer along with trigonomic and other required functions." Obviously, the term "software bloat" was still to be invented.

Anyway, I rewrote Vic's VB program into a Visual FoxPro library. Then I added the interface around the various parts. But more on that soon....

Sunday, August 27, 2006

Just an observation...

...but why is it, that when the price of gas drops by more than 10 cents (to around $ 0.94 a litre), virtually overnight, no one says anything about this? No mention of this in the newspaper, on radio or TV? No one complimenting the government or the oil companies for doing such an efficient job? Strange. Just an observation though, I didn't mean to criticize anyone.

Sunday, August 20, 2006

Finishing up the bedroom basement

Back on June 11th, I did an analysis of basement subfloor options and then decided to go with a product called OvrX. OvrX comes in 2 x 2 feet tiles. The product itself is a 1/2" Styrofoam layer mechanically bonded to 5/8" OSB. The styrofoam has grooves cut (or ground might be a better term) on the bottom, to allow for air and moisture to pass through. Total thickness is 1 1/8" or 29mm.

So off to the local lumber yard I went. I ordered the OvrX and lo and behold, they had it in stock. I was able to load all 43 tiles (i.e 172 square feet) into my little Echo, so I guess you could call that an advantage.

Now, when I got futher into checking out the condition of the walls and the insulation contained within them, I just made an on the spot decision to tear it all out. Like Mike Holmes would say: "It's all gotta come down!". On the outside wall, there was about 1" of beaded styrofoam, but only at the upper 3 feet, the rest had nothing. This was overlaid with, count them, 2, not 1, layers of drywall. The drywall was held up by 2" x 2" strapping. The beaded styrofoam sat between this, with lots of air gaps. In addition, some of the inside walls had mould on the bottom of the drywall. Not a good situation. The fun part about ripping out drywall is that it goes very quickly. The drudgery part is cleaning it all up. Next came the strapping. Down to clear bare concrete walls.

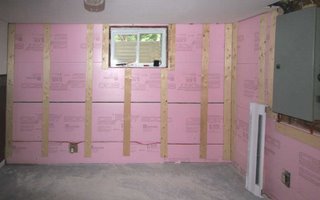
I decided to do the outside walls with extruded polystyrene, commonly called styrofoam pink. These sheets I applied straight onto the concrete wall. That way, you have an continuous, uninterrupted insulation barrier. No gaps, no nothing. If you cut the sheets just a fraction too wide, they'll stay in place because of the friction fit. No glue or anything necessary. Somewhere I had read that you should then apply 1 x 3 strapping every 2 feet and attach your drywall to this. I followed a slightly different technique by using plywood instead. I went to the lumber yard, bought a sheet of half inch plywood, then asked them to cut it into 12 strips of 3 7/8, which they were happy to do of course at $ 0.50 a cut. Then I simply applied these strips to the wall instead of the strapping. The reason I did this is because the 1 x 3 strapping tends to be very cheap spruce, and when pierced by drywall nails, it can split very easily. When this happens, its holding power is obviously severely diminished. This will not happen with the plywood. By the way, I attached the plywood strips to the wall by first drilling a hole through the plywood, the styrofoam and then finally into the concrete, making sure that the total depth of the hole was a minimum of 3 1/4". Then I used 3 1/4" Tapcon screws to do the final attachment. Overall, the wall operation (i.e.styrofoam and plywood strips) went fairly smoothly. The pink styrofoam is easy to work with. It comes in shiplap, and to accommodate electrical cables, I simply cut off the shiplap from one piece and routed the cable through the channel that became available because the shiplap was no longer there.

Since I used 1 1/2 styrofoam, the total insulation value of the outside wall from top to bottom is R 7.5. Not quite code, but a heck of a lot better than before.

Next, I applied the OvrX. Hmm, wish I could say this was a snap to install. Unfortunately, it wasn't. I had one heck of a time keeping the tiles aligned. The tiles are tongue-and-groove and I suppose that it doesn't take much for OSB chips to clog the tongue, forcing you to bang away at the other end of the to-be-inserted tile. Too much banging puts the previously laid tiles out of alignment and so round and round we go.

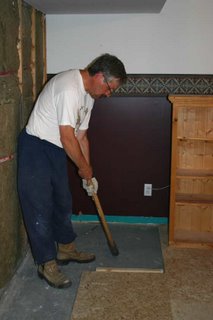
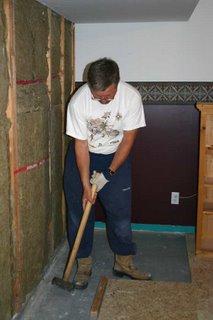
In hindsight, what I would have done is attach the first couple of tiles to the floor with Tapcon screws. That way they would be kept nice and steady and theoretically wouldn't budge easily. So I struggled at floor level, tapping and banging and cursing, all at the same time. I took me about 4 hours to do a 160 square feet floor, not exactly record speed, in fact very slow. When almost done, I discovered that using a piece of 2 x 2 and a sledge hammer, I could lay the tile while standing, which made for quite an improvement in my working conditions.

It is also very hard to get the last row to fit in properly, since you have no 'banging' room. I used a tool for applying laminate flooring to get at least some leverage, but still, it was a struggle. In the end, I decided to drive some Tapcon screws through some of the pieces where the seams weren't all that close together. This is something I rather would not have done.

I had run a temperature check on that room, prior to laying the OvrX tiles. Over a 24 hour period, the temperature difference between ceiling and floor temperatures was close to 4 degrees. After the tiles were laid, this difference went down to around 2 degrees. Once the laminate floor went in, it further decreased to 1.5 degrees.


Next on the agenda was the drywall. I wanted to minimize the amount of joints required and so we used 12' sheets for most of this. Ronny helping me out with this made it all that much easier. Taping and mudding went fairly easily, along with applying primer paint. I don't know about the finish paint, as the design for that and the application of it was done by Amanda!

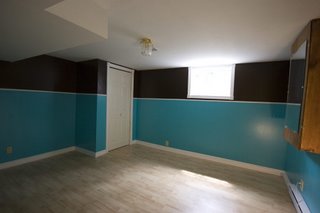
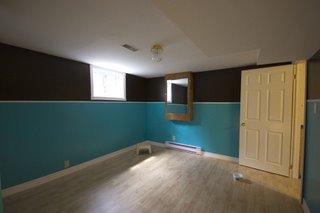
The laminate floor went in without a hitch. Then I hung the doors (huge pain, as everything is crooked!) and applied the trim, caulking and painting. Now it's done. Almost. The brown cabinet hiding the electrical panel still needs to be painted white. But then, you should always leave something to look forward to, shouldn't you?


Tuesday, August 15, 2006

Weather not fit for any umbrella


Mid summer was not a good period for our lawn furniture. Let me explain why.

- On July 2, a short, but violent mid afternoon thunderstorm managed to create havoc with the above named furniture. Specifically, the backyard table, complete with umbrella, the lawn chairs, the single pole umbrella as well as Anne's new installed 'book case' with glass shelves were all blown over. The single pole umbrella had 2 70 kg blocks of concrete holding it down, to no avail. You can see one of the blocks thrown over the side of the deck by the force of the wind. We were able to repair the umbrella by attaching of piece of aluminum to the only rib that was broken. We placed the umbrella back on the deck and, as further reinforcement, added a couple of lag bolts screwed into the deck to hold it down more. We cleaned up the rest of the mess. Some damage was done, but not too bad.


- July 15th was a bit windy, but otherwise a beautiful summer's day. Ronny and I were installing a cabinet in the shed and Anne was watering the flowers on the deck. All of a sudden we hear her scream. We look over and the next thing you know, we see umbrellas flying everywhere. What I suspect happened is that this was a dust devil, a mini tornado, minus the dust, so invisible otherwise. It did just a fine job on the single pole umbrella: the concrete blocks and the lag bolts didn't budge this time, but something had to give so it was the top pivot point, where the umbrella is fastened to the post, that gave way. It was twisted at about a 45 degree angle, making the entire umbrella useless. Solution: demolish it. Ronny got to use his brand new hack saw on the aluminum posts. The table umbrella magically survived again.

- July 20th. Well, we needed shade on the deck, 'cause otherwise it is hotter than blazes back there. I made the mistake of reading the Canadian Tire flyer, in which I spotted a four poster 'sun shelter' for only $ 50. After some humming and hawing in the store, I decided to buy one. Another mistake. After we got it home, we noticed how extremely flimsy it was. We got it up allright, with a little bit of improvisation. The shade was great while it lasted (the shelter, that is). On that fateful July 20th, the rains came. Well, that's a bit overdramatic. Let's just say we had a pretty good shower. Now, one of the key properties of water is is that it is fairly heavy. It started to collect in one of the pockets of the cover of the sun shelter. Once enough water collected, it just plain collapsed. Shoulda known. It was a sun shelter not a rain shelter. Back to Canadian Tire to get my money back.

- August 2nd. So far we had blamed all our troubles on Ronny, my nephew from the Netherlands. After all, all this began the day after he arrived. However, he left on the 22nd of July and on August 2nd, we were once again hit by a terrific thunderstorm, in the middle of the night (1:30 to be exact). It woke me up, and it seemed to come on so fast that I told Anne: "Into the basement!" So we scurried on down, into the storage rooom, to wait this one out. Once things settled down a bit, we went upstairs and peeked outside, to see the table + umbrella blown over again (the umbrella was down), along with chairs and, once again, Anne's bookshelf with the last of the glass shelves now broken as well. We did a closer inspection at first light and noticed that the umbrella, which had landed against the kitchen window, had produced a hairline crack in that window. Umbrella busted for good. Solution: junk it.

Now, this last thunderstorm did quite a trick on trees in the neighborhood as well: there are about 10 trees down in our forest, with the path completely blocked. It took the top out of the very tall maple in my neighbour's yard, which, of course, had to land in our front yard, so now I'm stuck with it.

More about the storm here and here. Surprisingly, we never lost our hydro.

This storm was the end of five days of 35+ weather. Some days produced humidex readings of 46! Talk about your wet blanket!Now we've been down to 25+ with fairly low humidity readings, just perfect!

Monday, June 19, 2006

Crop Duster

Living in the country and in this part of the country means that you have to put up with certain nuisances city dwellers can only dream of.

One of those is crop dusting. On a regular basis in late spring/early summer, the local crop duster will deliver his poisonous load to farm fields surrounding our house.

Now, to be sure, he always chooses nights when the winds are totally calm, so very little, if any, drifts over our way, so we only cough our lungs out for a couple of hours.

Besides that though, there is the plane buzzing overhead, making you think you were caught up in a remake of the Darryl F. Zanuck movie 'The Battle of Britain'. The engine whines, howls, screams, but fortunately so far, hasn't coughed, sputtered, nor died. Fortunately for us, because we'd be dead too.

Tonite, he was at it again, so I went out and shot some digital film. In this particular venture, he was dusting a potato field, just west of us.
Notice the hydro wires. Do planes and that type of equipment get along?


Average height over the field is probably 10 feet or so. At the very last second, literally, he'll pull up and just barely clear the tree tops before making a hard turn and coming in again to do the next pass. Why fight your way through traffic to see the Labour Day Air Show, when you can see it all in your backyard? Sheesh....


Wednesday, June 14, 2006

Toyota Echo Gas Mileage

Sure it's ugly. I agree. But for gas mileage, you can't beat it. The Toyota Echo that is.

Too often when 'gas mileage' gets mentioned in a conversation, incredible numbers get thrown around, usually by people driving monstrous gas guzzlers. "I get 40 miles to the gallon in my Cadillac Escalade." Another good one is: "This minivan of mine, I easily get 600 km out of a tank." Well, yeah, too bad your tank can hold 50 gallons, oops, 225 litres.

And so, to set the record straight, to throw out the gauntlet, here are the stats for the Echo. It was born in the year 2000, has standard transmission, and lacks airconditioning (unless you wanna count the open windows). Engine size is 1.5 litres.

On my last tank, which started at km 7435 and lasted to km 8143, it consumed 35.51 l of gasoline, standard unleaded (octane level 87). That's 708 km, of mostly highway driving, but some stop-and-go as well.

Here we go with the calculations:

First, the official Canadian version: 35.51/(708/100) = 5.0155 litres per 100 km
Next, the old Canadian version 440 miles/7.81 Imperial gallons = 56.34 miles per Imp gallon. Woohoo!
For our US friends 440 miles/9.38 US gallons = 46.91 miles per US gallon.
Now the old European way (don't know how they currently do it over there): 708/35.51 = 19.94 km per litre.

Not bad eh? With gas mileage like that, who needs hybrids?

My first car, a 1968 Dodge Monaco, with an 8 cylinder 383 cubic inch engine (that's 6.3 litres folks) got something like 18 miles to the gallon. Thank God they don't make 'em like that anymore!

Update 2006/06/22: On my next tank, I got 56.5 miles per (Imperial) gallon or 4.9905 litres per 100 km! I am below the magic 5.0 level!

Sunday, June 11, 2006

Basement subfloor decisions...

Recently, our basement got flooded. That in itself is a story and a half, but I won't go into that. Suffice it to say that the water just managed to get over the edge of the sump pump well and then wicked through all the carpeting throughout the basement. So all the carpeting had to be removed (it was a load a crap anyway) and we are now back down the the bare concrete floor.

That floor is in remarkably good shape. It is even, with only some hairline cracks here and there. No spalling or delineation anywhere, so that's good. However, it is cold. Very cold. Even this late in spring, the floor temperature hovers around 14 °C. So that's not good.

Now, as we all know, hot air rises and cold air sinks, so theoretically, that cold air doesn't readily mix with the warmer air at higher elevations. Therefore, the heat loss through the floor is a lot less than if, for instance, the ceiling were at 14 °C . Nonetheless, some loss must occur. Furthermore, especially this time of year, warm, moist air from outside enters the house, gets into the basement where it cools, causing the humidity to skyrocket down there. This, in turn, forces us to run the dehumidifier, which is noisy, hard on the hydro bill and needs periodic maintenance.

So I started looking for a solution to these problems. Rather than just taking a wild guess (or doing some research and doing a best guess), I decided to get all scientific, by setting up tests with different materials and options to insulate the basement floor.

Design criteria:
- warmer basement floor
- lower humidity level
- ease of installation of the product
- cost
- small loss of headroom

Products to test

- Dricore

Dricore ( www.dricore.com ) consists of half an inch OSB glued onto a polyethylene sheet, from which cleats protrude, allowing air to circulate under the floor, to remove humidity. Total thickness is 7/8" or 22 mm. It comes in squares of 2' x 2' (61 x 61 cm), which have a tongue and groove. The tile is put down and the next one is tapped into the groove to complete the assembly.

The manufacture claims an insulation value of R-2
Cost: $ 6.99 per tile


- OvrX
OvrX ( www.ovrx.com ) is 1/2" Styrofoam mechanically bonded to 5/8" OSB. The styrofoam has grooves cut (or ground might be a better term) on the bottom, to allow for air and moisture to pass through. Total thickness is 1 1/8" or 29mm.
It, too, comes in squares of 2' x 2' (61 x 61 cm), which have a tongue and groove. As above, assembly is through the tongue and groove system, no screws are driven into the floor.

The manufacture claims an insulation value of R-3.2
Cost: $ 7.99 per tile


- 1" (25 mm) Styrofoam sheets (2' x 8' or 61 x 244 cm) overlayed with 4' x 8' ( 122 x 244 cm) sheets of OSB or plywood. Pilots holes are then drilled through the plywood, the styrofoam into the concrete floor and Tapcon screws are then driven into these holes. No picture for this, as I am sure you can well imagine what this looks like. Styrofoam would be R-5, with OSB .2 for a total of R-5.2
Cost: $ 13.11 per sheet of Styrofoam and $20.00 for OSB.

First, I wanted to test for the insulation values. So I set up a test bed, consisting of the material to be tested, the bottom portion of a picnic cooler, a 27 W soldering iron and a temperature monitor. I used the soldering iron, to get a nice steady heat source, which would be the same for all the tests. The temperature monitor comes from http://www.ibuttonlink.com. It is a 1 wire device, which hooks up to the serial port on a computer, and reports the temperature every time the computer program requests it. I wrote a Visual FoxPro application that makes a request every 30 seconds and then logs the result into a database table.

Here is the setup, soldering iron on the left, temperature monitor on the right, spaced about 1', I mean 30 cm apart. In this case, they are positioned on top of the OvrX material.


Here's the complete setup, with the cooler positioned over top to minimize the influence of the ambient temperature. You can see the Dricore tile on edge on the left and a leftover piece of 2" (51mm) Styrofoam on the right. You could probably argue and say that, hey, there was an air gap caused by the wires forcing the rim of the cooler up, but my answer is that that applied evenly to all the tests, so the net effect was zero.


Next I ran the test for all the materials. Note that I only had a 2" (51 mm) piece of Styrofoam, since I had this left over and I was too cheap to buy a 1" piece. Basically what I did was, I put the material to be tested on the floor, put the soldering iron on it along with the temperature monitor, about 30 cm apart. I then put the cooler upside down over top and plugged in the soldering iron and started the monitoring and logging process. Once I saw that the maximum temperature had been reached (i.e. the temperature wasn't going up anymore), I unplugged the soldering iron and waited for the whole thing to cool down, still continuously logging.

I repeated this four times. Once for each of the materials tested and once just on the bare concrete floor. Then, I did some data manipulations and graphed the results using Open Office Calc ( www.openoffice.org ) Basically, Open Office is a free replacement for Microsoft Office.
The graphing turned out to be a huge pain in the neck, it would have been better to use my trusty old Graph NT ActiveX in Visual FoxPro, but hey it's done now, so who cares.

Here's the graph:


The 2" Styrofoam itself manages to drive the temperature all the way up to 53 degrees, whereas the bare concrete floor only makes it to 24 degrees. Quite a difference. The styrofoam backed OvrX makes it to 41 degrees, beating out Dricore, which gets up to 36 degrees.

Analysis

Insulation

- OvrX scores significantly better than Dricore. A 1" piece of Styrofoam would obviously be best.

Cost (in Canadian dollars)

According to the manufacturer's web site, I need 44 tiles for both Dricore or OvrX

- Dricore: 44 x $ 6.99 = $ 307.56
- OvrX: 44 x $ 7.99 = $ 351.56
- 1" Styrofoam/1/2"OSB = (11 x $13.11) + (5 x $20) = $ 244.21

Installation

- Dricore and OvrX should be equal to each other here. Both should beat the combination of Styrofoam/OSB sheets handily. Handling large sheets of OSB over top fragile exposed Styrofoam, then drilling holes through all that into the concrete and driving screews does not exactly appeal to me.

Loss of Headroom

Dricore comes out best here at 22 mm (7/8"). Ovrx is second at 29 mm (1 1/8"). Styrofoam/OSB last at a whopping 1 1/2" or 38mm.

Conclusion

OvrX beats out Dricore in terms of insulation. OvrX also beats out the Styrofoam/OSB combination due to ease of installation. The cost is higher, but my blood pressure has got to be worth something. The difference in headroom between Dricore and OvrX isn't significant enough to make a difference. So that's it! On to the ordering stage.

Tomorrow, I'll install temperature monitoring in the room at eye level as well as floor level. Then we can do a before and after installation comparison, and see what difference there is.

Saturday, May 20, 2006

Google Sketchup

Google has done it again. On March 14, they bought up a small startup software company called @Last Software. This company produced Sketchup, a 3D modelling tool and sold it for $495.00 per copy. On April 26, Google released it to the world...for free. I should say that you can still buy a professional version of Sketchup, but for the average Jill or Joe, the free version should do nicely.

Be careful...it is very addictive. The easiest way to get started after you
download your copy (around 20Mb) is to follow the quick video tutorials offered on the Google Sketchup web site.

We're planning an addition to the house to be built sometime this year. Basically, a 1 room extension, dimensions 14' x 20' (or 4.6m x 6.5m). So I got started, drawing this in Sketchup, just to get an idea what it might look like.

So far I'm up to version 13. Whether or not you can do actual final construction drawings using this, I don't know, the jury is still out on that. It might just be too finicky.

The neat thing is that you can drag the cursor all around and rotate your drawing every which way, see things from the top, the bottom, sides, zoom in for very close detail.

After you download and install Sketchup, you can download my
drawing as well. Amazingly enough, the whole drawing only takes up something like a 130 k.

Monday, May 08, 2006

Google Planimeter and Rain

Huh?? First of all, what's a planimeter? A planimeter is a device which allows surveyors, cartographers and other people with weird interests to quickly compute the area bounded by a number of points by setting the counter on the device to zero, then dragging one arm of the device along the outline of the area while keeing the other arm stationary. Once you come back to the original point, i.e. you complete the circle or loop, you can read the approximate area off the dial. Now, mind you, it's quick and dirty: I wouldn't use it to calculate the amount of concrete in a complicated structural component, as you're liable to have a whole lotta concrete left over. (Quick, where's the nearest pothole?). While working for MTO in the seventies, we used the planimeter extensively to compute monthly estimates on road contracts.

In doing research for converting Latitude and Longitude to UTM, I came across Jeff Poskanzer's web site (www.acme.com). While perusing his site, I noticed one item that piqued my interest: Google planimeter. It allows you to calculate the area for either large or small areas and anything in between, with a good degree of accuracy! How it's done, I don't know, but it sure is interesting. In short, it shows you a Google Map, you place points on it by clicking your mouse and when you think you've got enough accuracy, you read the total area displayed just below the map. Way cool!

So, there was a massive rainstorm in the US on April 29th and 30th (2006). From Accuweather.com I copied the map showing the average rainfall expected for the area involved. Then, I used the Google Planimeter involved to compute the total area. As you can see, the area measured 1.292e+6 km2, which equals 1.292 million square kilometers (I only measured the 2 inch rainfall area.) 2 inches equals 5 cm. To calculate the total amount of rain:

1,292,000,000,000 x .05 = 64,600,000,000 cubic meters. That's 64 billion 600 million!

From
www.intellicast.com, I got the actual situation as of about 7:30 am April 29th.